Relocating to a new city or neighbourhood? One of the essential tasks you’ll need to handle is transferring your LPG (liquefied petroleum gas) connection from your current agency to a new one. While the process may seem daunting, it’s actually quite straightforward if you know the right steps. In this guide, we’ll walk you through the 5 key steps to transfer your gas connection smoothly in India, along with the documents you’ll need and some helpful tips.
Step 1: Identify the New Gas Agency
Before initiating the transfer, you need to find out which gas agency serves your new location. You can get this information from:
- The official website of your gas company (like Indane, Bharat Gas, or HP Gas)
- Asking neighbours or the local grocery store about nearby distributors
- Checking the list of authorised distributors in the area
Make a note of the new agency’s name, address and contact details. You’ll need these for the transfer request letter.
Step 2: Prepare the Required Documents
To transfer your gas connection, you’ll need to submit certain documents to your current agency. Here’s what you should keep ready:
- Identity Proof: A government-issued ID like your Aadhaar card, passport, voter ID or driving licence.
- Address Proof: Documentation confirming your new residence address, such as:
- A recent utility bill (electricity, water, or telephone)
- Your rental agreement
- Your company accommodation letter
- Gas Booklet: The booklet you received during your initial gas connection registration.
- Gas Connection Voucher: The 2-page document with details of your current connection.
- Transfer Request Letter: A written request stating your intention to transfer, including:
- Your customer ID
- Your current address
- The address of the new agency you wish to transfer to
Ensure all these documents are valid and up-to-date. It’s a good idea to carry both original copies and photocopies.
Step 3: Visit Your Current Gas Agency
Armed with the above documents, pay a personal visit to your current gas agency’s office. Remember, the transfer request must be submitted by the person in whose name the connection is registered.
Here’s what you need to do:
- Submit the transfer request letter along with the identity proof, address proof, gas booklet and connection voucher. The staff will verify these.
- If you’re moving to a different city, you’ll also have to surrender your existing gas cylinder and regulator at this point.
- Collect a receipt or acknowledgement for your transfer request submission.
- Depending on the agency, you may receive a refund of the security deposit you paid initially for the cylinder and regulator.
Step 4: Collect the Transfer Voucher
After accepting your request, the current agency will issue you a Transfer Voucher. This crucial document contains:
- Your customer details
- The details of your current connection
- The address of the new gas agency you’re transferring to
The transfer voucher acts as proof of your transfer request. You’ll need to submit it to the new agency to complete the process. Double-check all the details on the voucher before leaving the current agency’s office.
Step 5: Submit Transfer Request at New Agency
The final step is to visit the new gas agency’s office, along with:
- The transfer voucher from your previous agency
- Your identity and new address proofs
Submit these documents to the new agency, along with any additional forms they require. You’ll also need to pay a nominal transfer fee, which varies across agencies.
The new agency will then verify the transfer request. Upon confirmation, they will issue you:
- A new gas connection booklet
- A new consumer number for future cylinder bookings
- A fresh connection voucher with your updated address
That’s it! Your gas connection transfer is now complete. You can book your first cylinder delivery with the new agency.
Important Tips for a Smooth Transfer
- Initiate the transfer process at least 2 weeks before you need the first cylinder in your new location
- Confirm the documents required by both your current and new agencies to avoid any delays
- Make copies of your transfer request letter and voucher, and keep them safe for future reference
- If the transfer is taking longer than expected, follow up with both agencies
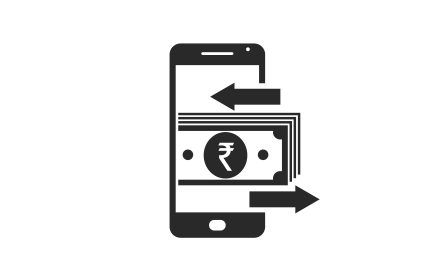
Simplify Utility Bill Payments with the Airtel Thanks App
Settling in a new place involves a lot of paperwork and running around. But the Airtel Thanks App can help simplify the process of paying your utility bills, including gas bills. This comprehensive app lets you:
- Recharge your gas connection
- Pay your gas bills with just a few taps
- Track your payment history
- Get reminders and notifications for due dates
What’s more, you can earn Airtel Thanks reward points on every bill payment, which can be redeemed for cashback and offers! Download the Airtel Thanks App today and enjoy a hassle-free bill payment experience.
Transferring your gas connection may involve a bit of effort, but with proper planning and this step-by-step guide, the process can be quick and efficient. Remember to keep all your documents handy, and don’t hesitate to clarify any doubts with your gas agencies. Here’s to a warm, comfortable new beginning in your new home!