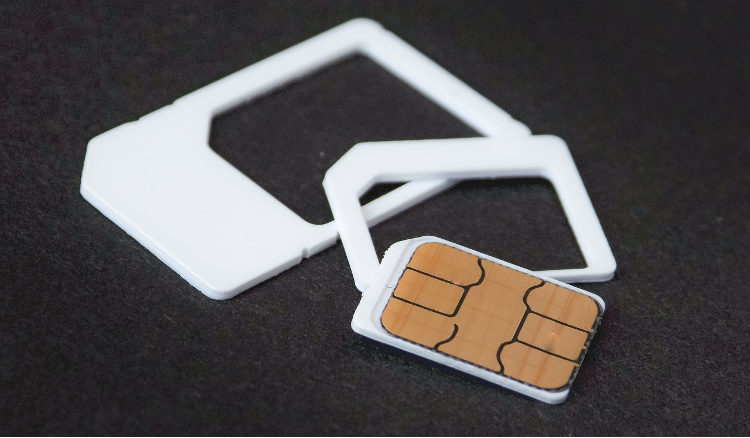
Gone are the days when you needed a physical SIM card to get connected. With the advent of e-sims, activating a mobile connection on your iPhone has become easier than ever. If you’re wondering how to activate e-sim on iPhone, we’ve got you covered. In this guide, we’ll walk you through the simple steps to get your e-sim up and running in no time.
What is an e-sim?
Before we dive into the activation process, let’s understand what an e-sim is. An e-sim, or embedded SIM, is a digital SIM card that’s built into your iPhone. Unlike traditional physical SIM cards, an e-sim doesn’t require a separate slot in your device. This not only saves space but also allows you to have multiple mobile plans on a single device.
Compatibility Check
To activate an e-sim on your iPhone, you first need to ensure that your device supports this technology. e-sim is available on the following iPhone models:
- iPhone XR
- iPhone XS
- iPhone XS Max
- iPhone 11 series
- iPhone 12 series
- iPhone 13 series
- iPhone 14 series
- iPhone SE (2nd generation and later)
If you have one of these models, you’re good to go. Additionally, make sure your iPhone is unlocked. You can check this by going to Settings > About and scrolling down to Network Provider Lock. If it says “No SIM restrictions,” your device is unlocked.
Steps to Activate an e-sim on an iPhone
Step 1: Get an e-sim Activation Code
To begin the activation process, you’ll need an e-sim activation code from your mobile carrier. This code is typically provided in the form of a QR code or a set of numbers. If you don’t have an activation code, contact your carrier to obtain one.
Step 2: Scan the QR Code
If your carrier has provided a QR code for e-sim activation, follow these steps:
- Open the Camera app on your iPhone.
- Point the camera at the QR code and wait for it to be recognised.
- Tap on the Mobile Plan notification that appears on the screen.
- Follow the on-screen instructions to complete the setup.
Alternatively, if you have the QR code saved in your Photos app:
- Go to Settings > Mobile Service (or Cellular Service).
- Tap on Add eSIM.
- Select Use QR Code.
- Tap on Open Photos and select the saved QR code image.
Step 3: Enter the Activation Code Manually
If you don’t have a QR code and instead have a set of numbers as your activation code, you can enter it manually:
- Go to Settings > Mobile Service (or Cellular Service).
- Tap on Add eSIM.
- Select Enter Details Manually.
- Enter the SMDP address and activation code provided by your carrier.
- Follow the on-screen instructions to complete the setup.
Step 4: Activate Your e-sim Line
Once you’ve scanned the QR code or entered the activation code manually, your e-sim will be installed on your iPhone. To activate it:
- Open the Settings
- Go to Cellular or Mobile, depending on your iOS version.
- Find the e-sim line you just installed.
- Toggle the switch next to Turn On This Line to the ON position.
Step 5: Troubleshooting
If the activation process takes longer than expected, try restarting your iPhone to finalise the e-sim setup. If you encounter any issues, go to Settings > General > About and check for any numbers under EID. If there are no numbers, contact Apple Support or your carrier for assistance.
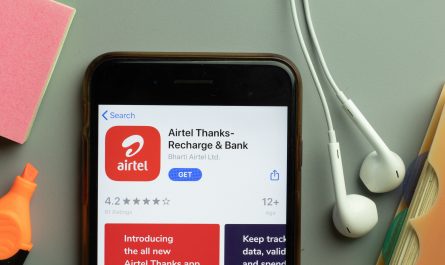
Once you’ve successfully activated your e-sim on your iPhone, consider downloading the Airtel Thanks app to manage your mobile plan with ease. The app offers a range of features, including:
- Checking your balance and data usage
- Recharging your prepaid connection or paying your postpaid bills
- Managing multiple Airtel accounts from a single interface
- Accessing exclusive rewards and offers
With the Airtel Thanks app, you can enjoy a seamless mobile experience without the hassle of physical SIM cards.
Activating an e-sim on your iPhone is a straightforward process that can be completed in just a few steps. Whether you choose to scan a QR code or enter the activation code manually, you’ll be up and running with your digital SIM in no time. If you encounter any issues during the activation process, don’t hesitate to reach out to your carrier or Apple Support for assistance. And remember, with the Airtel Thanks app, managing your e-sim connection becomes even easier.